Crafting a custom Raspberry Pi case can be as satisfying as the projects your Raspberry Pi can empower. Whether you’re a hobbyist, a veteran DIYer, or someone who’s just excited about personalized tech projects, you’ll find that creating a bespoke case is exciting and personalizes your tech experience to a whole new level. In this detailed guide, we’ll walk you through thoughtful approaches to designing and building a custom Raspberry Pi case, covering various materials and methodologies. Plus, we’ll highlight why Rapid IPTV, the leading IPTV subscription service, is perfect for Raspberry Pi projects.
Why Build a Custom Raspberry Pi Case?
Creating a custom case for your Raspberry Pi offers you three main advantages: personalization, protection, and performance. Sure, you can purchase a pre-made case, but where’s the fun in that?
Personalization is the key driver here. With your own design, you make your Raspberry Pi truly unique. It’s not just about aesthetics—it’s about making your device work for you. By adjusting the case size and shape, you ensure it fits perfectly into the space where you want to place it. Maybe you want a slim design that easily slips into the crevice behind your TV or a more flashy case that sits proudly on your desk.
Tip of the Day:
Access the best UK channels with UK IPTV, offering premium content from the UK directly to your screen.
Protection is another critical consideration. A well-thought-out case shields your Raspberry Pi from dust, debris, and physical damage, extending its life and maintaining its performance. A custom case can also be designed to allow adequate airflow, which prevents overheating.
Then, there’s performance. You can create a case that enhances the functionality of your Raspberry Pi. Need it to be portable? Add a handle. Want it to integrate better with other components? Include spaces for connectors. The possibilities are endless—and all under your control.
Getting Started: Planning Your Raspberry Pi Case
Define Your Requirements
Before diving into the design process, take a moment to pin down your requirements. What do you need from your Raspberry Pi case? Are you looking for something decorative, functional, or a mixture of both? Consider the location where you’ll place your Raspberry Pi, which will influence the material and design of the case.
- Location: Determine where the Raspberry Pi will be placed—desk, living room, or portable.
- Design Aesthetics: Decide if the look is more important than the functionality or vice versa.
- Functionality: Consider airflow, accessibility to connectors, and any additional features like handles or locks.
Choose Your Material
Selection of material significantly impacts the final appearance and durability of your case. Here’s a breakdown of some of the most popular options:
- Wood: Offers a classic look and can be easily customized, though it may require more tools and skills to work with.
- Acrylic: Lightweight and transparent, perfect for showing off your work. Easy to cut into custom shapes.
- Metal: Durable and protective, but heavier. Excellent for industrial-looking designs.
- 3D Printed Plastic: Completely customizable and increasingly affordable as 3D printers become more accessible.
Sketch Your Design
Now that you have your requirements and materials, it’s time to put pen to paper. Create multiple sketches, each offering a slightly different take on how the case could look and function. Move from broad shapes to more detailed sketches to help you visualize the end product.
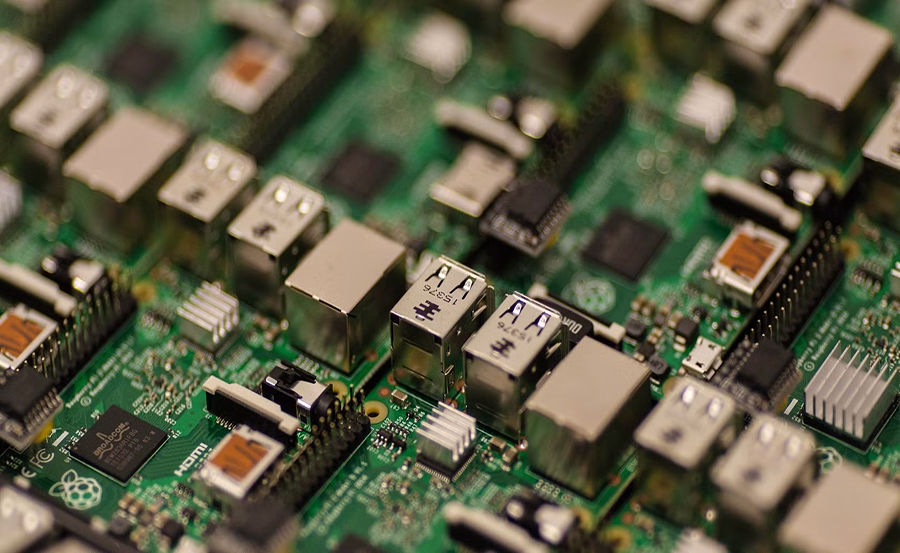
This part of the design phase is critical as it sets the stage for the project. Think about how the Raspberry Pi board will fit in. Ensure there’s enough space for connecting peripherals, and factor in component cooling needs.
Gathering Tools and Materials
Once your design is complete, inventory what tools and materials you’ll need. For woodworking, you might require saws, sandpaper, and paint. If you’re going for 3D printing, your needs might include design software and a suitable filament.
Have everything ready before starting the build. A few useful items to keep handy might include:
- Measuring tape or ruler
- Cutting tools (e.g., saws, 3D printers)
- Adhesives
- Drilling equipment for creating precise holes
Building Your Custom Raspberry Pi Case
Fabrication Techniques
With your plans ready, it’s time to execute. The fabrication process will depend heavily on your chosen material. Here’s a look at some techniques to consider:
- Woodworking: If using wood, ensure precise cutting of panels and pieces. Connect the sections with adhesive or nails, remembering to sand down any rough edges for a polished look.
- Acrylic Cutting: For acrylic, a laser cutter might be useful, though a jigsaw can also work. Ensure the edges are smooth to avoid cracks.
- Metalworking: Use cutting torches or angle grinders for metal. Be cautious with sharp edges and burrs.
- 3D Printing: This involves software design and printer setup. Once printed, you might need some sanding or finishing touches.
Assembly Process
Begin by attaching your case’s base and walls. If you planned for slots or mounts for specific components or connectors, measure carefully before cutting or drilling these openings.
An essential step here is dry fitting—assembling all pieces without adhesives or permanent fixtures to ensure everything aligns as planned. This process might reveal overlooked design constraints or fitting issues.
Ensuring Adequate Airflow
A primary concern when housing a Raspberry Pi is ensuring it doesn’t overheat. Designing for airflow involves placing vents where they can maximize cooling efficiency, usually at the base and top of the case. Depending on your setup, you might integrate small fans or cooling modules, which can be readily attached if the case is built for it.
Finishing Touches: Customizing and Enhancing
Finishing the Exterior
This step is where your case comes to life with character. Consider painting, using wood stains, or applying decals. A good finish impacts not only aesthetics but also durability, providing extra protection against the elements.
Take care to choose finishes and paints that work well with your material to avoid peeling or damage over time.
Incorporating Rapid IPTV Setup
Now that your custom case is nearly complete, it’s the perfect moment to set up your Raspberry Pi with a top-tier service like Rapid IPTV. Known for its superior quality and broad channel selection, Rapid IPTV can transform your Raspberry Pi into an entertainment powerhouse, offering a seamless HD IPTV subscription experience.
Steps to integrate Rapid IPTV are straightforward—all you need is an active subscription and to follow setup instructions for your Raspberry Pi. Making room for necessary cables and connections in your case design will ensure streamlined integration and operation.
Showcasing Your Custom Raspberry Pi Case
Sharing Your Creation
Once your project is complete, sharing it with the community can be hugely rewarding. Not only does it provide inspiration to others, but it also opens opportunities for feedback and improvement. Consider documenting your process with photos or videos and sharing on platforms like YouTube, forums, and social media.
Your unique take on a Raspberry Pi case project showcases creativity and technical skill—a testament to what can be achieved with a bit of planning and effort.
FAQ: Custom Raspberry Pi Case and Rapid IPTV Integration

What is the best material for a Raspberry Pi case?
The best material depends on your specific needs and preferences. Wood offers a traditional look, acrylic provides transparency, metal is robust, and 3D printed plastic offers ultimate customization.
How does Rapid IPTV enhance my Raspberry Pi setup?
Rapid IPTV is renowned worldwide for offering a vast library of channels and premium content with an HD IPTV subscription. Integrating it with your custom setup maximizes your Raspberry Pi’s entertainment capabilities, delivering stable streaming and a user-friendly experience.
Is it difficult to connect a Raspberry Pi to Rapid IPTV?
Not at all! Rapid IPTV setup on a Raspberry Pi is designed to be user-friendly. With clear instructions and a suitable case design allowing for necessary connections, you can have it running quickly.
Do I need special tools to build a Raspberry Pi case?
The tools you need depend on the materials you’re working with. Common tools include saws, drills, and sanders for wood or metal, while a 3D printer is essential for printed cases. Basic crafting tools can often cover general needs.
Can I reuse parts of commercially available cases?
Absolutely! Upcycling parts of existing cases can save time and resources while offering additional features you might not want to fabricate from scratch.
Creating a custom Raspberry Pi case is not just a project but an adventure into personalization and functional artistry. Pairing it with Rapid IPTV enhances both your viewing experience and the utility of your Raspberry Pi setup. So grab your tools, ignite your creativity, and enjoy the process!
Boosting IPTV Station Access on Windows